A cabinet simulator is a device designed to emulate the frequency response of a speaker system. Guitar and bass speaker systems have a very pronounced filtering effect, rolling off the low and high frequencies very sharply due to their physical and electrical properties. Things like cone size, material, impedance, enclosure size and type, even distance from a wall, affect these filters very noticeably.
Features:
The Philosophy behind the design is to allow the user to CREATE their own cabinet response settings, moving away from the typical preset cabinet simulators in the market. This approach let the musician to define his own sound and getting an accurate reproduction of it when recording and playing live gigs, without depending on mic placement, amplifier or cabinet availability..Just dial in your favorite tone, tune your cabinet response and go straight to the PA or recording gear!!
A lot of bridges in this, not my favourite but will work very well and without a lot of space wasted. I would wit into a 1590B, I’ll try to put this one up on this weekend… let’s see!! See you on the other side!!!
I’ve been working in developing my own layouts for some effects not available on the internet, nor http://effectslayouts.blogspot.com, nor other places like that, but… like in this case (THEREMIN FUZZ), official sites offer diagrams and some other things very handy to debug a viable layout for self consuming. As you can see, I’m not as good as mr. storyboardist (the master, the man) but I’ve tried my best to make it understandable.
Here my etched design for the aluminium enclosure:
Here an official video to listen this great FX:
I hope this is useful for somebody else, I really miss http://effectslayouts.blogspot.com, they must be really busy so meanwhile I’ll try my best to share some designs I just… needed?! (G.A.S. talking LOL) See you on the other side!!!
Ram The Manparts… by Fuzzrocious… it’s not the best graphic effects pedal I’ve ever made, but it has something that made me keep it (I finished it a couple of months ago or so) and use it. It is a quite original design based on a LM-386 to which I have added a Blend control to be able to use it as a bass fuzz (I think it is the best use that can be given to it).
I’ve pasted the explanation to the name of the pedal for curious people:
As a curiosity, I’ll say that I’m using a new method (I haven’t seen anyone that crappy try it) to use PCB potentiometers as chassis potentiometers. I’ll explain it in another post but just in case you were curious about it
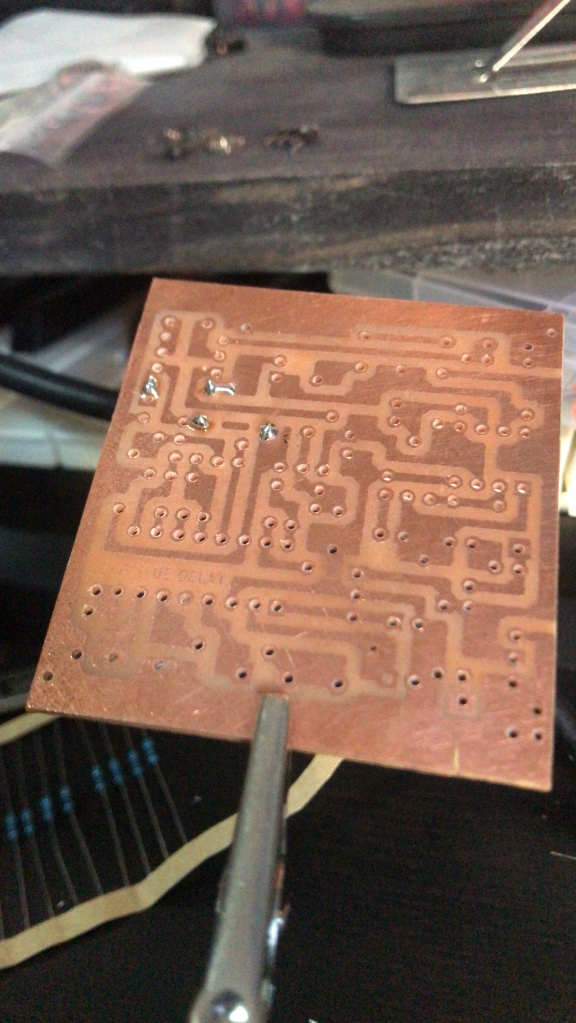
When I was done with THE RAM, I started on the Leviathan, a version/clone of the Deep Blue Delay that I was commissioned by Dani, the guitarist of Toxic Army. I just love the worn drawings, I don’t know why!
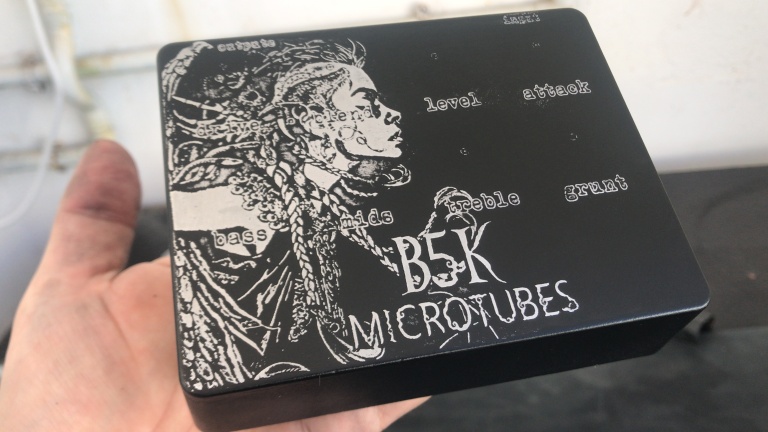
And so far for this post, in the next one I will start to explain a little bit the process I follow to make the finishes, you can get very ‘dirty old school’ things or very decent things like the B5K. See you on the other side!
NEW GUITAR/BASS DIY PEDALS SERIES (PARTE 2)
Ram The Manparts… de Fuzzrocious… no es el mejor pedal a efectos gráficos que he hecho, pero tiene un algo que me hizo conservarlo (hace un par de meses o así que lo terminé) y utilizarlo. Es un diseño bastante original basado en un LM-386 al cual le he añadido un control de Blend para poder usarlo como fuzz para bajo (creo que es el mejor uso que puede dársele)
Pego la explicación al nombre del pedal para curiosos:
Como curiosidad, diré que estoy usando un método nuevo (no he visto a nadie tan cutre que lo intente) para utilizar potenciómetros de PCB como potenciómetros de chasis. Lo explicaré en otra entrada pero por si os había causado curiosidad.
Cuando terminé con THE RAM, me puse con el Leviathan, una versión/clon del Deep Blue Delay que me encargó Dani, el guitarrista de Toxic Army. Los dibujos así de desgastados me encantan, no sé porqué!
Y hasta aquí por esta entrada, en la siguiente empezaré a explicar un poco el proceso que sigo para hacer los acabados, se pueden conseguir cosas muy ‘dirty old school’ o cosas muy decentes como el B5K. Nos vemos al otro lado!!
After a few weeks of spending all the free time I have learning some things I needed to be able to build myself some bass and guitar pedals, I think I can put some pictures and detail a little bit the process I followed to end up with these finishes that at least I love ^^
First of all, I have to confess that this is not the first time I build pedals, and that I have always found very useful information in pages like:
Although the designs sometimes require a bit of ‘imagination’ to complete, on both pages you will have hours of DIY electronics projects for guitarists assured!!! However, this time it wasn’t about cloning an effect, but adding a few things that I’m sure will come in very handy when using the pedals later on.
First I started with some bass preamp designs, as unfortunately a couple of preamps broke down and I had to find an alternative to the noisy and flimsy Chinese models I could find on the internet. Well, the first attempt was with the well known Stingray, which for years has been widely versioned and installed in a multitude of basses with two tone controls (Fender, Musicman, Bc Rich). The version of the circuit that I used works perfectly although it doesn’t have a metal ‘punch’ but rather a vintage sound a bit dark for my taste. As I didn’t like it, I looked for the three band EQ version of the Stingray which unfortunately didn’t have a PCB template to etch on a board (DiCosimo Audio diagram), so I made a layout for that circuit which so far has worked for me mainly to tame the mids in lows with three bands of EQ.
After this preamp, I decided to build one in the image and likeness of the one used in the Ibanez SR series, since they are the ones that have given me the best results both in recording and in concerts and rehearsals. I recently posted the final result, although the J201’s pickup was not correctly linked and I have corrected it. Also, by bending the legs of the transistor you can leave it fixed by changing collector for base etc. This is the new layout that I have already tested and installed in the fanfret bass I’ve made 🙂
When I finished with the electric bass preamps, and although I still have a couple more in the pipeline (Ampeg, Gallien Krueger) I started the vóragine of effect pedals. In total I have made several more or less original designs in terms of some parts of the circuits and others simply based on more or less consolidated but quite expensive effects… I leave a ready and in the next post I will update with some pictures of everything. See you on the other side!!!
FINISHED: Robot (DBA Robot Based)
Ram The Manparts (Blend control added)
Triple Wreck (Wampler)
Leviathan (Deep Blue Delay based, as a gift to the guitar player in my other band Toxic Army)
B5K Mitrotubes (based in Darkglass Microtubes B3k with a 3 bands equalizer of an Ibanez SR-480 in front)
Sentinel (weird Reverb/drone ambient thing)
IN PROGRESS: Revv G4 (having some problems getting it into a 1590B, I’m still figuring out how to get it in)
Dragon Armor (Tight Metal caps adjusted version)
Fortin 33
Ravenna (Snow White Auto Wah version)
Cthulhu Dawn (multi pedal project I started some years ago and being updated)
PLANNED BUT NOT STARTED: Omnicab Simulator
Theremin Fuzz
Pitchshifter (ATTiny85 based)
Lovecraft (bass overdrive with graphic EQ and IR charger)
DH Pitch shifter robot
Wah 1590A/1590B
Nueva serie de pedales DIY para bajo/guitarra (Parte 1)
Después de algunas semanas de pasarme todo el tiempo libre que tengo aprendiendo algunas cosas que necesitaba para poder construirme algunos pedales para bajo y guitarra, creo que puedo poner algunas fotos y detallar un poco el proceso que he seguido para terminar con estos acabados que al menos a mí me encantan ^^
En primer lugar, tengo que confesar que no es la primera vez que construyo pedales, y que siempre he encontrado muy útil la información en páginas como:
Aunque los diseños a veces requieren un poco de ‘imaginación’ para completarse, en ambas páginas tendréis horas de proyectos DIY de electrónica para guitarristas asegurados!! Sin embargo, esta ocasión no se trataba de clonar un efecto, sino de agregar algunas cosas que luego seguro que me son muy útiles a la hora de utilizar los pedales.
En primer lugar comencé con algunos diseños de previos para bajo, ya que por desgracia se me estropearon un par de previos y tenía que encontrar una alternativa a los ruidosos y endebles modelos chinos que podía encontrar en internet. Pues bien, el primer intento fue con el ya conocido Stingray, que durante años ha sido muy versionado e instalado en multitud de bajos con dos controles de tono (Fender, Musicman, Bc Rich). La versión del circuito que utilicé funciona a la perfección aunque no tiene una ‘pegada’ metalera sino más bien un sonido vintage algo oscuro para mi gusto. Como no me terminaba de gustar, busque la versión del Stingray de tres bandas de ecualización que por desgracia no tenía una plantilla PCB para grabar en una placa (diagrama de DiCosimo Audio), así que hice un ‘layout’ para dicho circuito que hasta ahora me ha funcionado sobre todo para domar los medios en bajos con tres bandas de ecualización.
Después de este previo, me empeñé en montarme uno a la imagen y semejanza del que llevan los Ibanez de la serie SR, ya que son los que mejores resultados me han dado tanto en grabación como en conciertos y ensayos. Posteé hace poco el resultado final aunque el patillaje del J201 no estaba correctamente enlazado y lo he corregido. Igualmente, doblando las patas del transistor se puede dejar fijo cambiando colector por base etc. Este es el nuevo ‘layout’ que ya he probado e instalado en el bajo fanfret 🙂
Cuando terminé con los previos de bajo eléctrico, y aunque aún tengo un par más en el tintero (Ampeg, Gallien Krueger) empecé la vóragine de los pedales de efecto. En total he hechos varios diseños más o menos originales en cuanto a algunas partes de los circuitos y otros simplemente basados en efectos más o menos consolidados pero bastante caros… Dejo un listo y en el próximo post actualizaré con algunas fotos de todo. Nos vemos al otro lado!!!
TERMINADOS:
Robot (DBA Robot Based)
Ram The Manparts (Blend control added)
Triple Wreck (Wampler)
Leviathan (Deep Blue Delay based, as a gift to the guitar player in my other band Toxic Army)
B5K Mitrotubes (based in Darkglass Microtubes B3k with a 3 bands equalizer of an Ibanez SR-480 in front)
Sentinel (weird Reverb/drone ambient thing)
EN PROCESO:
Revv G4 (con algunos problemas a la hora de meterlo en una 1590B, estoy pensando aún como meterlo)
Dragon Armor (Tight Metal caps adjusted version)
Fortin 33
Ravenna (Snow White Auto Wah version)
Cthulhu Dawn (multi pedal project I started some years ago and being updated)
PLANIFICADOS PERO SIN EMPEZAR:
Omnicab Simulator
Theremin Fuzz
Pitchshifter (ATTiny85 based)
Lovecraft (bass overdrive with graphic EQ and IR charger)
I have been frequenting the excellent http://effectslayouts.blogspot.com/ website for some time now, from which I have gained numerous ideas and got me interested in circuits, effects pedals etc.
Based a bit on his way of organising the designs, and not being happy with the preamps of some of my basses I decided to take a look at the circuit diagram of an Ibanez preamp, specifically the one in the SR-480 series. I have two Ibanez SR-300 series basses that I will try to reverse engineer the circuit as they are the ones I use for recording and I love the EQ, but it will be complicated because they are SMD . I haven’t tried the preamp yet… but this coming weekend I’ll upload a demo. The interesting part is that it has all the connections on the same side, so you can use some fast ARDUINO type connections to solder them and so you can use it on different basses etc. Hope you find it interesting. See you on the other side!
This is the schematic diagram; it’s from 2008 and I don’t know where it came from, but it looks like a transcription of the original Korean model. If you see any mistake in the schematic or incorrectness don’t hesitate to contact me to improve it.
PCB DE UN PREAMPLIFICADOR PARA BAJO DEL IBANEZ SR-480
Hace ya un tiempo que frecuento la excelente web http://effectslayouts.blogspot.com/ de la cual he sacado numerosas ideas e hizo que me interesase de nuevo por los circuitos, pedales de efectos etc.
Basándome un poco en su forma de organizar los diseños, y no estando contento con los previos de algunos de mis bajos decidí ponerme con el esquema del circuito de un preamplificador de Ibanez, en concreto con el que lleva la serie SR-480. Tengo dos bajos Ibanez de la serie SR-300 de los que intentaré sacar el circuito por ingeniería inversa ya que son los que uso para grabar y me encanta el EQ, pero será complicado porque son SMD . Aún no he probado el previo… pero este próximo fin de semana subiré una demo. La parte interesante es que lleva todas las conexiones por el mismo lado, así que puedes usar unas conexiones rápidas tipo ARDUINO para soldarlas y así poder utilizarlo en diferentes bajos etc. Espero que os resulte interesante. Nos vemos al otro lado!
Este es el diagrama, es de 2008 y no sé de donde ha salido, pero parece una transcripción del modelo original coreano. Si ves algún fallo en el esquema o incorrección no dudes en contactar conmigo para mejorarlo.